

How to Take a Screenshot on a Mac: A Patient, Step-by-Step Guide
A screenshot is a picture of what is currently showing on your Mac screen. It can be a helpful way to save information, show someone an error message, remember an online receipt, or send a family member exactly what you are seeing.
This guide explains every part of the process in plain language. You do not have to memorize all of the shortcuts. Start with the method that feels easiest, and come back whenever you need a reminder.
Why would you want to take a screenshot?
There are many everyday reasons to save a picture of your screen:
- Show a problem: You can send a picture of an error message to a family member, a support person, or a business.
- Save important information: A screenshot can preserve an order confirmation, appointment time, tracking number, or webpage before it changes.
- Remember where you found something: You might capture directions, a recipe, a product listing, or an instruction you want to read again.
- Ask a clear question: Instead of trying to describe every button on the screen, you can send the exact picture.
- Keep a record: A screenshot can document a suspicious message or popup. Do not click the suspicious item just to capture it.
First, learn the keys Apple is talking about
When Apple writes Shift-Command-3, the hyphens do not mean that you press a hyphen key. They mean that you press the three named keys together.
Command
The Command key has this symbol: ⌘. On most Mac keyboards, it is on both sides of the space bar. It may also say “command.” Do not substitute the Control key.
Shift
The Shift key usually has an upward arrow: ⇧. There is normally one on the lower-left side and another on the lower-right side of the keyboard.
Number keys
Use the number row across the top of the keyboard. For these shortcuts, press the regular 3, 4, or 5 key, not a number on a separate keypad.
Space bar
The Space bar is the long, wide key at the bottom center. It is the same key you use to put a space between words.
For a shortcut, gently hold down the first keys, tap the number or Space bar when instructed, and then release. You do not need to press hard. If nothing happens, try again slowly and make sure the Mac is awake and showing the screen you want to capture.
Method 1: Capture the entire screen
This is the simplest shortcut. It takes a picture of everything visible on your Mac screen, including the menu bar, open windows, and anything else showing.
- Arrange your screen exactly the way you want it to appear.
- Press and hold the Shift key and the Command key.
- While holding those two keys, press the number 3 once.
- Release all three keys.
You may see a small preview thumbnail in a corner of the screen. You can click that thumbnail if you want to mark up or edit the screenshot. If you do nothing, the screenshot will save automatically.
By default, Mac screenshots are saved on the Desktop. The file usually has a name such as Screen Shot 2026-09-06 at 1.25.10 PM. The exact time and date will be different on your Mac.
Method 2: Capture only part of the screen
This method is useful when you want to capture one message, one photograph, or one section of a webpage without including everything else.

- Put the item you want to capture on the screen.
- Press and hold Shift and Command.
- Press the number 4, then release the keys.
- Your pointer will change into a small crosshair. A crosshair looks like two thin lines crossing each other.
- Move the crosshair to one corner of the area you want to capture.
- Click and hold your mouse button, or press and hold your trackpad.
- While still holding, drag across the area. You will see a rectangle showing what will be captured.
- When the rectangle includes exactly what you want, release the mouse button or trackpad.
When you release, the screenshot is taken and normally saved to the Desktop. If you change your mind before releasing, press the Esc key to cancel.
A helpful Space bar trick
Sometimes you draw the right-size rectangle but place it in the wrong spot. You can move the entire rectangle without changing its size:
- Keep holding your mouse button or trackpad after drawing the rectangle.
- Press and hold the Space bar.
- Drag the rectangle to the correct position.
- Release the Space bar, then release the mouse button or trackpad.
This takes a little practice. If it feels difficult, use the Screenshot app described below. It gives you visible buttons instead of requiring you to draw a rectangle with a shortcut.
Method 3: Capture one window or menu
This is often the cleanest choice when you want to show one application, such as Mail, Safari, System Settings, or a message window. It can capture the whole window neatly, without requiring you to drag around its edges.
- Open the window or menu you want to capture. If you want a menu, click it so the menu is open first.
- Press and hold Shift and Command.
- Press 4, then release the keys.
- Press and release the Space bar.
- Your pointer will change into a small camera icon.
- Move the camera over the window. The window should become highlighted.
- Click the highlighted window.
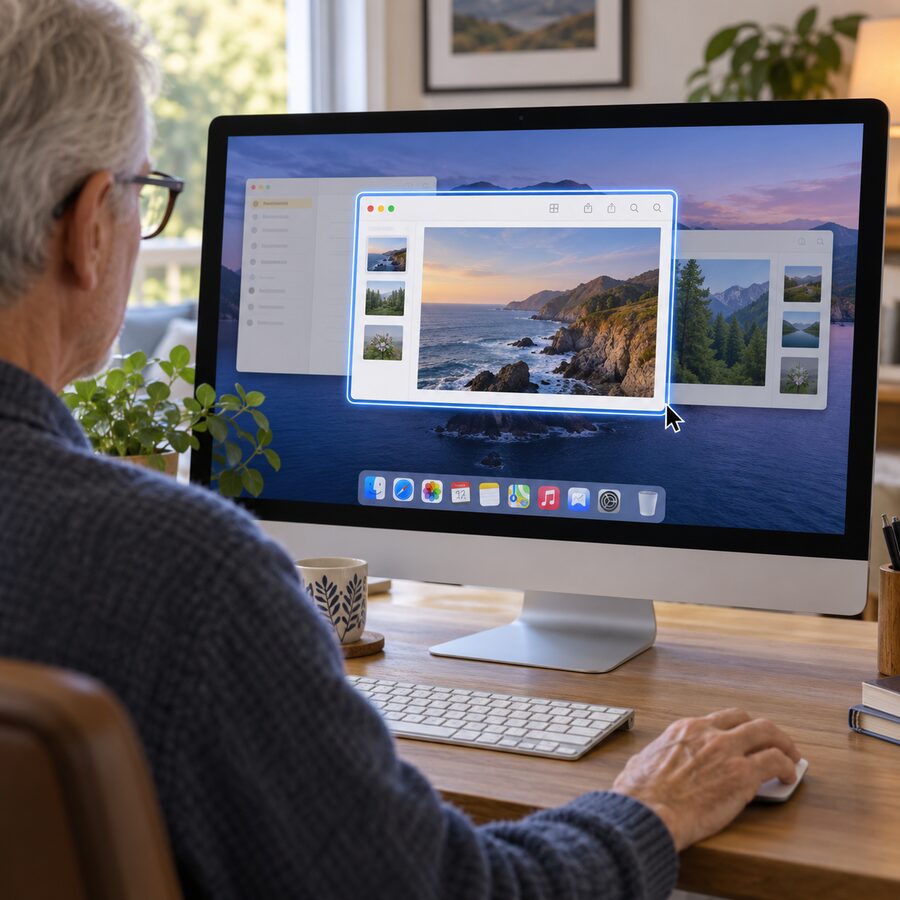
The screenshot will include the selected window and, normally, a small shadow around it. If you want to leave out the shadow, hold the Option key while clicking the window.
If the camera icon appears but you decide not to continue, press Esc to cancel.
Method 4: Use the Screenshot app
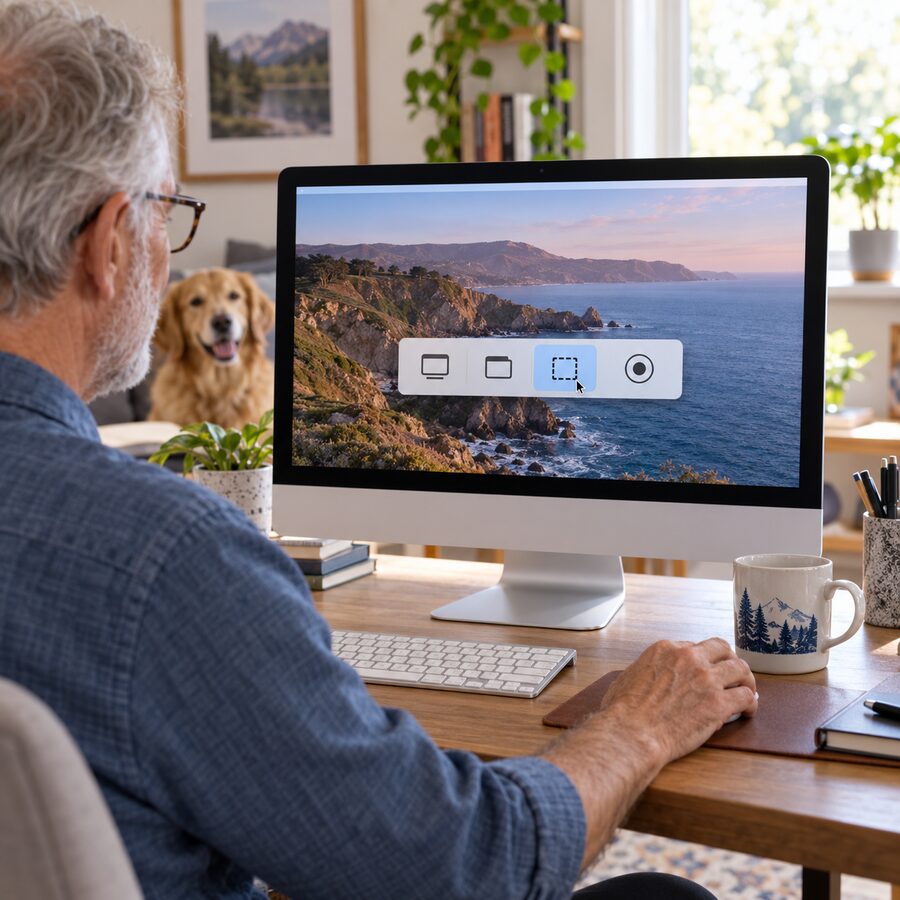
For many people, the Screenshot app is the easiest method because it puts the choices in a visible toolbar. You do not have to remember which number means full screen, part of the screen, or a window.
- Press and hold Shift and Command.
- Press the number 5.
- Release the keys.
- A Screenshot toolbar will appear, usually near the bottom of the screen.
The toolbar includes choices for capturing the entire screen, a selected window, or a selected portion. Choose the button that matches what you want, then follow the directions on the screen.
Useful Screenshot app options
Look for the Options button in the toolbar. Depending on your Mac and macOS version, it can let you:
- Choose where screenshots are saved, such as the Desktop, Documents, or another folder.
- Set a timer so you have time to open a menu or move the pointer before the screenshot is taken.
- Choose whether the small floating thumbnail appears after the screenshot.
- Choose whether the mouse pointer is visible in the screenshot.
- On supported Macs using macOS Tahoe 26 or later, choose between SDR, which is the most compatible PNG option, and HDR, which uses HEIF.
If you prefer menus and buttons, you can also open the app without a shortcut. Open Finder, choose Applications, open the Utilities folder, and then open Screenshot.
How to put a screenshot directly into an email
Normally, a screenshot saves as a file. You can also copy it to the Clipboard so you can paste it directly into an email or message.
To do that, add the Control key to the shortcut. For example, to copy a selected area instead of saving it to the Desktop, use:
- Use the shortcut and select the area as described earlier.
- Open your email or message.
- Click in the place where you want the picture to appear.
- Press Command + V to paste it.
If you are using the regular shortcut without Control, you can also drag the small thumbnail that appears after the screenshot into an email, message, or folder.
Where did my screenshot go?
Start by looking on the Desktop. The newest screenshot is usually near the right side of the screen and begins with “Screen Shot.” You can double-click it to open it.
If it is not there, open the Screenshot app with Shift + Command + 5 and check the location shown under Options. Someone may have changed the save location to Documents, Downloads, or another folder.
To rename the file, click it once on the Desktop and press Return, or Control-click it and choose Rename. Use a name that will make sense later, such as Printer-error-message or Online-order-confirmation.
Which method should you choose?
| What you want | Best choice |
|---|---|
| Everything on the screen | Shift + Command + 3 |
| Only a section of the screen | Shift + Command + 4 |
| One complete window | Shift + Command + 4, then Space |
| Visible buttons and more choices | Open the Screenshot app with Shift + Command + 5 |
| Paste the screenshot directly into a message | Add Control to the shortcut |
Common problems and simple fixes
“Nothing happened.”
Try pressing the keys together more deliberately. Hold Shift and Command, tap the number once, and release. If you are using a third-party keyboard, its keys may be labeled differently. You can use the Screenshot app from Finder instead.
“I captured the wrong thing.”
That is normal while learning. Press the shortcut again after arranging the screen. For one window, remember the order: Shift-Command-4, then Space, then click the window.
“The screenshot is black.”
Some protected video or television apps do not allow screenshots of their windows. Try capturing another part of the screen. If the problem only happens in one streaming or protected-content app, it may be a restriction from that app rather than a problem with your Mac.
“I cannot draw the box accurately.”
Use the Screenshot app. Its toolbar lets you choose a selected portion with visible controls. You can also use the Space bar while dragging to move your selection.
“I do not want private information in the picture.”
Cancel with Esc, close or hide the private information, and take the screenshot again. Before emailing it, open the picture and look at it carefully. A screenshot can contain more information than you intended to share.
Final reminder
You only need to remember one starting point: if the keyboard shortcuts feel confusing, press Shift + Command + 5 to open the Screenshot app. From there, choose the visible option that matches what you want.
With a little practice, taking a screenshot becomes a simple way to save information and explain a problem. You are not expected to get it perfect the first time. Take a practice screenshot of this page, find it on your Desktop, and then delete it when you are finished.
For Apple’s official instructions, see Take a screenshot on Mac.